A Sneak Peek into My Editing Process: Unveiling the Magic Behind the Lens in Boise, Idaho
January 16, 2019
As a photographer based in the beautiful city of Boise, Idaho, I am excited to give you an exclusive sneak peek into my editing process using the powerful software, Adobe Lightroom. Join me on this journey as we delve into the magic that happens after the shutter clicks, transforming raw images into stunning works of art.
Organizing and Importing: Efficiency and organization are key to a smooth editing workflow. Before diving into the editing process, I meticulously cull through my files in Narrative Select, a program that quickly helps me choose which images are the best. The editing process begins with culling and selecting the best shots from the session. I carefully review each image, considering composition, lighting, and overall impact. By narrowing down the selection to the strongest photographs, I ensure that only the highest-quality images undergo the editing process, saving time and maintaining a consistent level of excellence. I then back up all of these images online and on a hard drive to prevent loss. By establishing a well-structured foundation, I can seamlessly navigate through my vast collection of photographs.
Editing is where the true magic happens! I use powerful editing software to enhance the colors, tones, and overall mood of each selected photograph. From adjusting exposure and contrast to fine-tuning white balance and saturation, every adjustment is made with the intention of bringing the image closer to the original vision I had when capturing the shot.
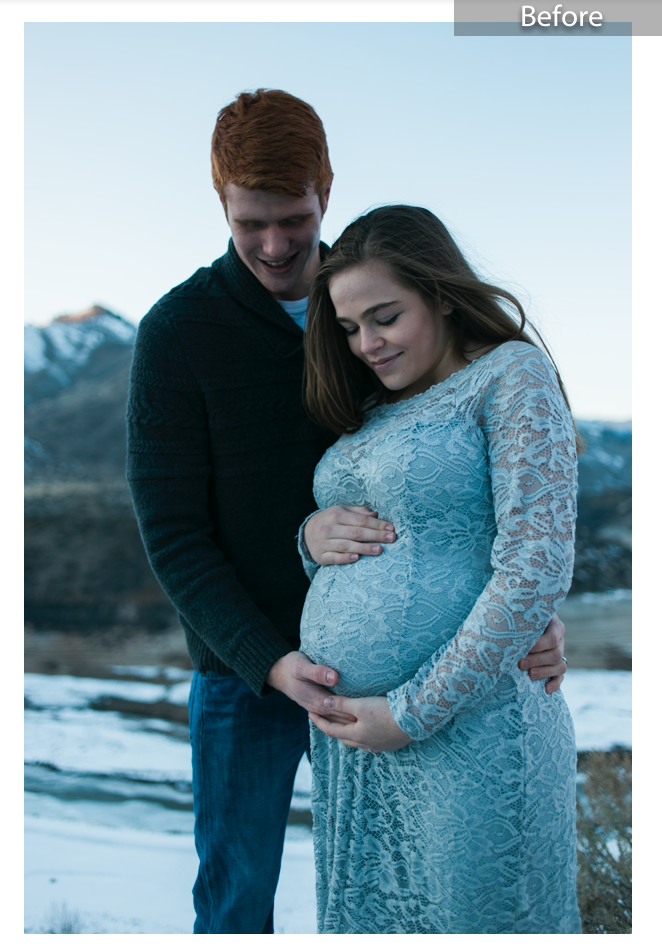
Upon importing my images I apply my preset- this helps me expedite some of the editing process and keep my images consistent. This image is technically not what it looks like straight out of camera- but with the preset applied.
Enhancing Colors and Tonal Adjustments: One of the most transformative aspects of editing in Adobe Lightroom is the ability to enhance colors and make precise tonal adjustments. Whether it’s fine-tuning the exposure, adjusting contrast, or boosting vibrancy, I strive to create images that accurately reflect the mood and atmosphere of the original scene. Careful adjustments can bring out the subtle details and breathe life into the photograph.
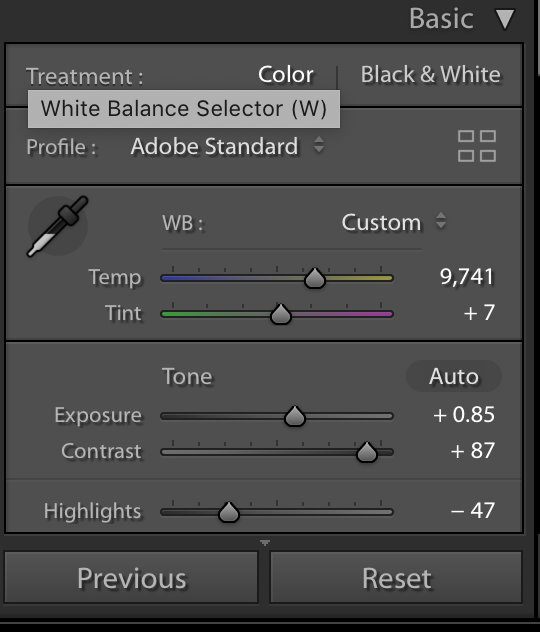
I adjust the white balance- this is different for every image. It adjusts the warm, cool, green, and pink tones of the photo.
 You can see the difference in skin tones now from white balance adjustments- I try to keep skin tones natural and warm.
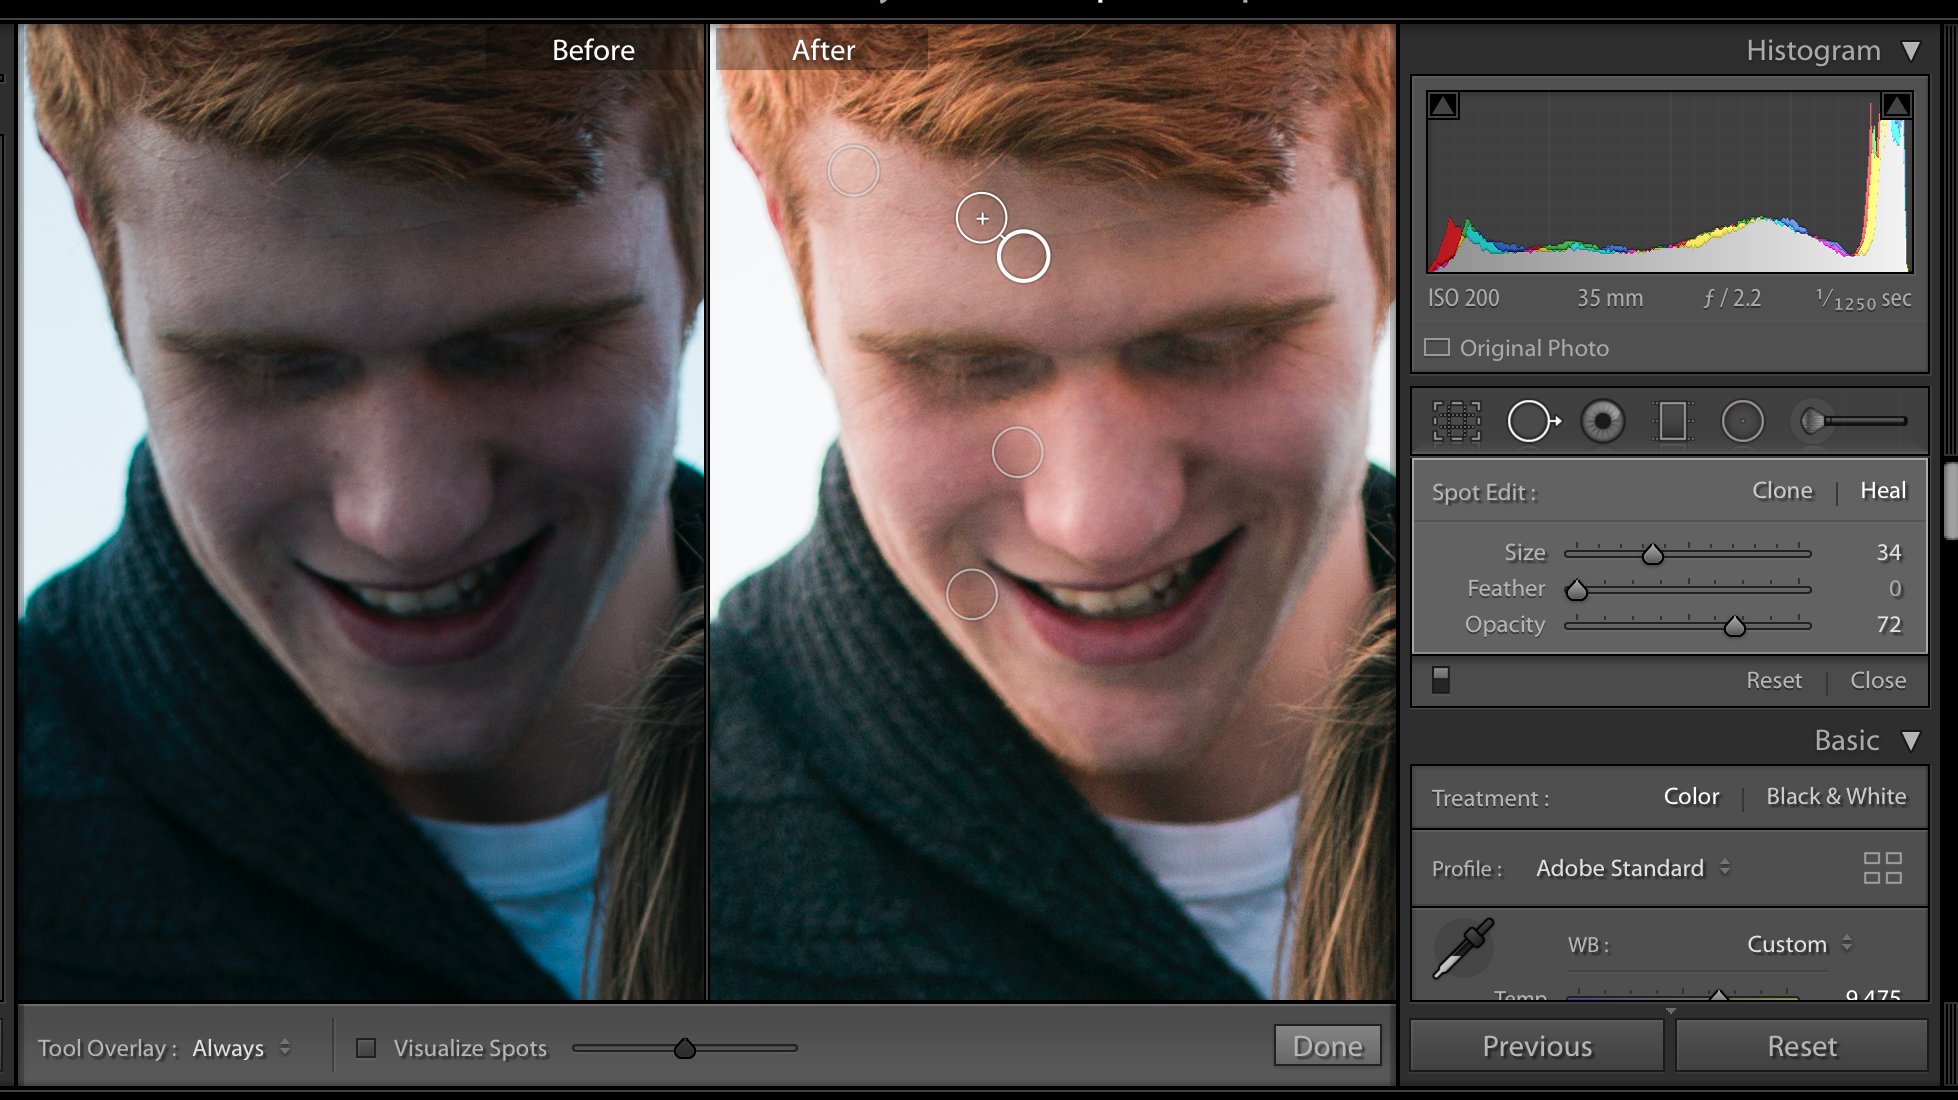 Next up: some light skin editing. Here is where I will use my spot editing tool to erase fine lines and blemishes. I will also occasionally use my adjustment brush to help out if the skin is a little pinker than others- as you can see here. I’ll remove a bit of the redness but we redheads are pretty naturally pink so I won’t do too much!
Each photographer has their unique style and artistic vision. Throughout the editing process, I strive to maintain consistency and showcase my personal touch. Whether it’s through color grading, applying presets, or utilizing specific techniques, I aim to create a cohesive body of work that reflects my artistic identity and resonates with my clients.
The final touches make all the difference. During the editing process, I meticulously review each image, paying close attention to fine details. This includes sharpening important elements, removing distractions, and ensuring that the final product is polished and ready for delivery.
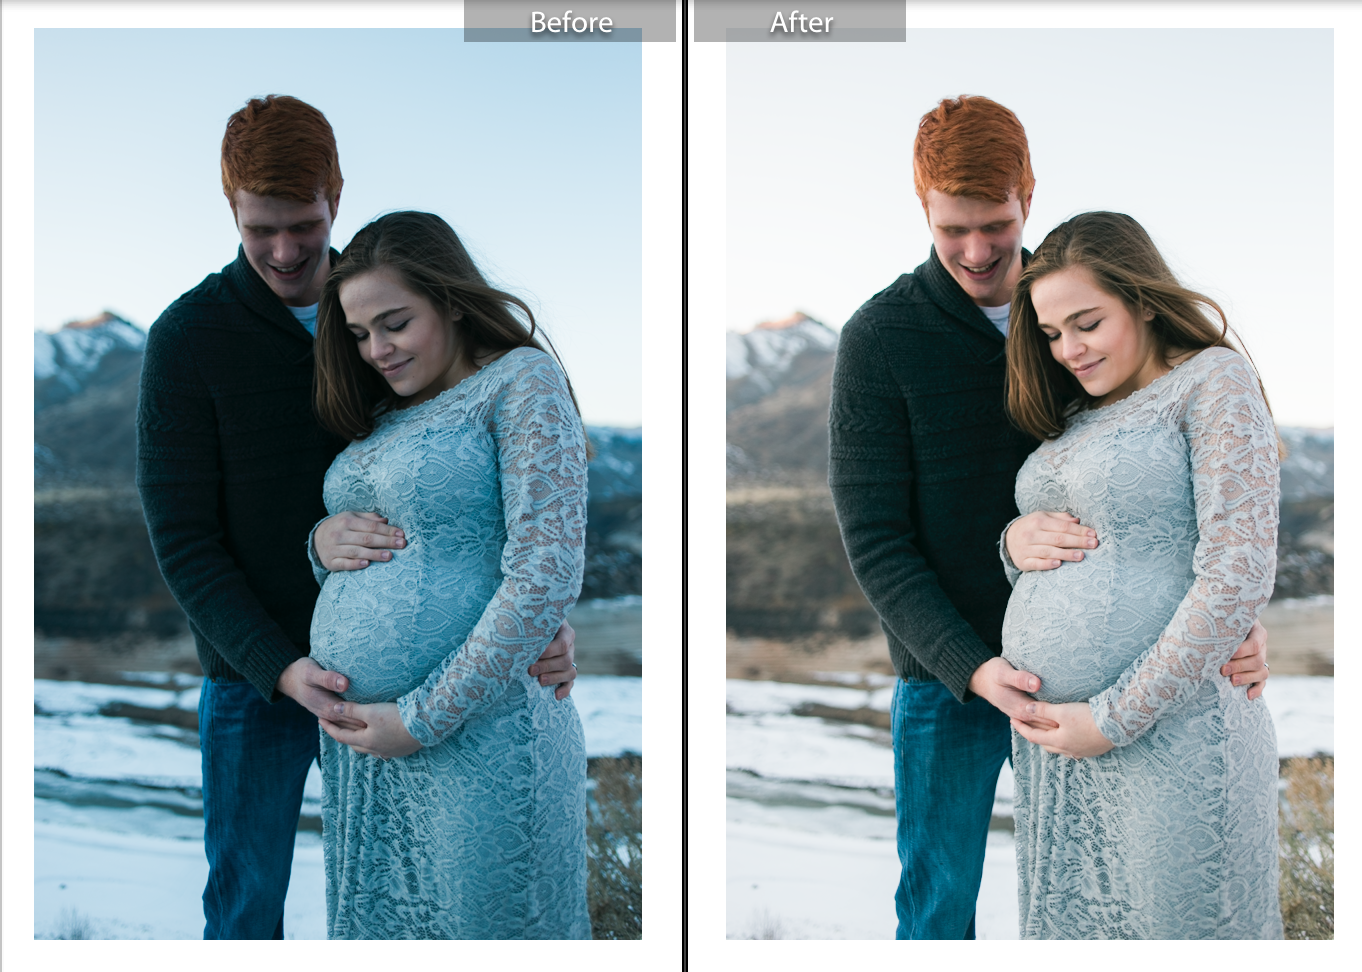 This is what a completed image looks like unless I need to pull it into Photoshop for a few more complicated adjustments.
The editing process is a vital part of a photographer’s craft, where raw captures are transformed into stunning masterpieces. I take pride in my editing techniques and the ability to bring out the best in each photograph. By organizing, selecting, enhancing, and perfecting the images, I aim to create a visual narrative that tells a compelling story and evokes emotions. Join me o this journey as we unveil the magic that happens behind the lens, and let’s create breathtaking images that truly captivate and inspire.
Thanks for joining me and checking out this sneak peek into my editing process. It really is efficient and simple but I think it helps me create some beautiful imagery while maintaining a fast turnaround time!
I’d love to hear your comments below!
Introducing Kristy, a talented maternity photographer in the beautiful Treasure Valley. With her passion for capturing the radiant glow of expectant mothers, Kristy creates stunning and heartfelt maternity portraits that celebrate the miracle of pregnancy. Her artistic eye and warm demeanor allow her to create a comfortable and enjoyable experience for every mom-to-be. With Kristy’s expertise, you can trust that your maternity photos will beautifully encapsulate the anticipation, joy, and love that fill this special time in your life. Contact Kristy today and let her artistry immortalize the precious moments of your maternity journey in the scenic Treasure Valley.


